 In the freelance voice-over business, we all wear many hats. The acting hat, the marketing hat, the book-keeping hat… The John Deere hat, the dunce cap, and the one with the mouse ears…It’s possible that you are a voice-actor by choice, but an audio engineer by necessity. If you are new to slicing and dicing .wav files, this tutorial is for you.
The images and shortcuts provided in this article reference Pro-Tools, and are Mac-centric, but the methods can be applied to any audio-editing software that you may happen to use. Honestly, if you are strictly doing voice-work, a free program like Audacity is all that you need to record and edit a single track. If you have goals of producing your own multi-track commercials or demo songs, then I would suggest
Pro-Tools (LE is fine), Adobe Audition, Sony Vegas or comparable software.
There are many reasons why you might edit a file instead of leaving it ‘as is.’ Perhaps you let the virtual tape roll as you gave two or three takes per line. You’ll want to pick your favorites and consolidate them into one ‘take’ for your audition. But let’s say you read the script straight through in real-time, with no mistakes. You might still want to tighten up the audio or eliminate some distracting breaths or ‘p’-pops (‘plosives). Or maybe you simply forgot to slate your audition. Thanks to non-linear editing, it’s easy to accomplish all of this! It’s like moving avatars around on a board game.
Let’s assume your studio is set-up, and you’re ready to record an audition. Before you even start recording, do a microphone check. Read the copy aloud with the same volume you feel you’ll be using for your actual read. Adjust your settings so that your voice is hot, without distorting. You should be able to peak in the red a bit, as long as you don’t linger there. While it’s true that you can normalize the audio once it’s recorded, you should only do so if you have to. Your audio is only as good as the sound you and your microphone are putting into the software. If you are recording at a low level and then gaining or normalizing everything after the fact, then you are raising the level of everything-including room noise! Is there a hiss in your recording? That’s why.
Don’t compress your voice too much (unless you are doing promos or trailers). You should be happy with the product you send out, but you should also know that it’s the producer’s job to EQ your voice so that it ‘prints’ over the music they are using or matches the sound of other actors in the same project. You’re making their job more difficult if you sound like a monster truck commercial.
Time compression is another popular tool that should stay in the box until all other options have been exhausted. You should be able to record your script in the time allotted. If not, try again and pick up the pace. Hopefully the copywriter understands ninety words or so (depending on syllables) equals thirty-seconds of copy. I’ll let you do the math on :15’s and :60’s. If the script is longer than that, it’s their fault, not yours. I would give them the audio as is, perhaps with a note saying you’d be happy to re-read if they want to shorten the copy. Word that more delicately than I just did, though. Make sure it doesn’t sound like a ransom note. “If you wish to hear your words aloud ever again, you will send me the proper length script in double-spaced, 12 point fonts.”
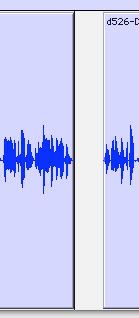
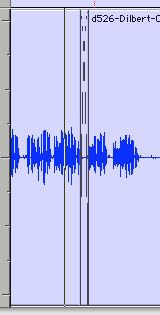
Back to time-compression. Never time-compress anything unless you are the end-producer! Your ears may think the compression sounds fine, but the person you send it to may hear artifacts in the audio that you don’t—and scrap your audition! It’s their job to decide to cut or squish a line of dialogue, not yours. However, you can tighten the audio up by editing out unnecessary pauses and breaths. Over time you’ll become familiar with the .wav forms and visually recognize the difference between speech and breathing. To make any kind of a cut, simply right-click and drag the cursor over the audio you wish to remove.

Once highlighted, hit the delete key on your keyboard.
 Presto! It’s gone! If you feel you made an error, simply go to the menu and select ‘undo.’ If the delete button doesn’t work in your software of choice, explore the drop down menus for the ‘cut’ or ‘delete’ function. You should also find a keyboard shortcut next to the description.
Use good judgment when removing breaths. Some pauses add to the drama of the read. And a few inhales and exhales simply make you sound… human. When tightening up breaths, I sometimes only cut the gap between two words in half, rather than eliminating the pause altogether. This way it saves time, but retains the intended cadence. In the end, it’s completely subjective. Trust your ear.
In Pro-Tools, editing in shuffle mode can make quick work of these edits.
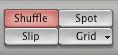 Basically, every time you cut something out, the audio snaps to the remaining piece of audio. It moves from the right to the left within your session. It’s a time-saver, but it can also be frustrating if you aren’t used to working this way. Fortunately you can always ‘undo’ your mistakes.
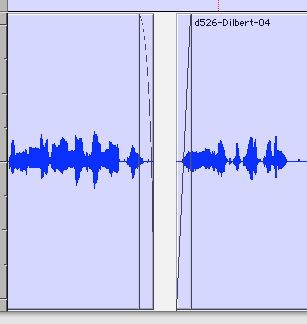
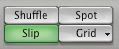 Slip mode (also Pro-Tools) will keep the gap created by your edit. So if you delete the middle of an audio file, you are left with a gap between two audio files. This is good if you want to remove a breath but keep the space between words. Slip mode also allows you to move audio around like puzzle pieces. Left, right, up, down… They’ll stay wherever you put them (as opposed to the snapping action of shuffle mode).
Not all of your edits will be clean. You may hear a tick at the point of edit. A gasp or pop. Dry mouth. Sometimes chopping off more of the file is not the answer. Try a fade instead.
If the transition sounds sloppy between two files that have been snapped together, try a cross-fade edit. Select a small patch of audio to the left and right of the break by holding down the Shift key while dragging the cursor. Create the cross-fade by clicking Apple + F.

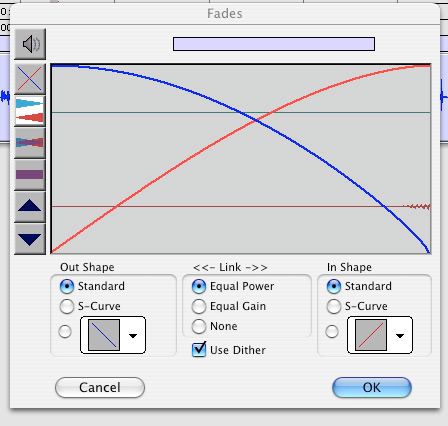
This usually does the trick, as it marries the two pieces of audio together. Picture your hands pressed together, with your fingers interlaced between each other; this is a good illustration of a cross-fade.
To make a fade at the beginning of a file, select a small portion of the audio by using the shortcut Alt + Shift + Tab. This highlights (blacklights?) to the left of the cursor. Now hit Apple + F to create the fade.
To make a fade at the end of a file, select a small portion of the audio by using the shortcut Shift + Tab. This highlights to the right of the cursor. Hit Apple + F to create the fade.
Now you’ve got your final audition piece, but it’s in several chunks. In Pro-Tools, you can go to the drop-down menu under edit and consolidate everything into one file.
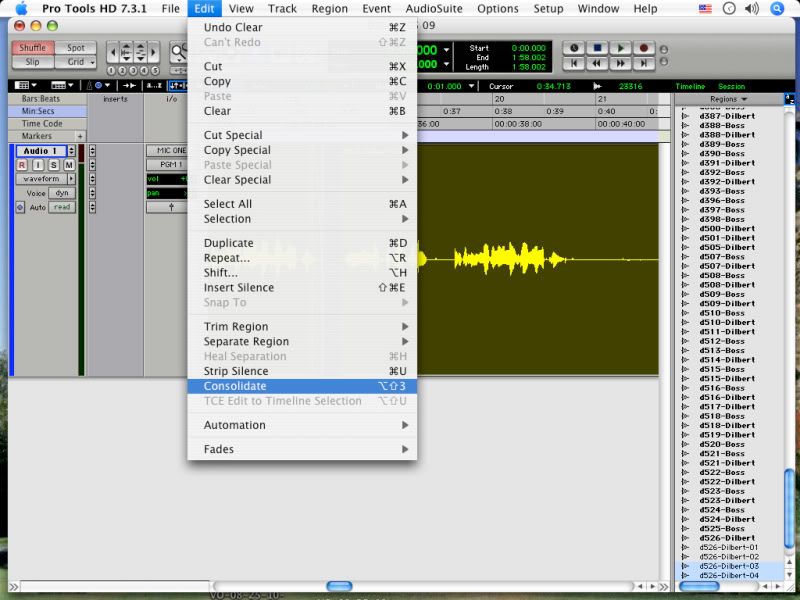 This way you can get it off of your screen, but easily access it from the audio bin if you need to refer to it later. It may also be necessary to save the file to a folder or desktop so that you can send the file to a client. Shift + Apple + K will do this quickly for you, keeping the consolidated audio in one piece in an environment outside of Pro-Tools.
Congratulations! You’ve made it to the end of my blog! I hope you found this tutorial useful. Feel free to add your own short-cuts and tips for Pro-Tools or other software in the comments section.
Oh. And hit save. Often. Like, OCD often. It prevents heartbreak. Or…heartburn. Maybe both. Ask your doctor if hitting save is right for you.
Hmm… That last sentence kinda’ rambled. I’ll have to go back and clean that up with some nice edits.
Short cuts:
Apple + F=Fade (or cross-fade, if you have two files selected)
Alt + Shift + Tab=Highlight to left of cursor
Shift + Tab=Highlight to right of cursor
Apple + S=Save
No comments:
Post a Comment